
You will often come across improperly chopped and trimmed samples when exploring the internet for new drum samples and sounds. From my personal experience, I can’t stand when samples are left with seconds of silence at the end or left with a millisecond or two of silence for swing on the front of the wav file. As a producer, you should choose when to add swing and silence to your songs. This quick and easy tutorial for FL Studio will show you how to easily touch up those poorly sampled wav files that are very popular on the internet because of lazy samplers.
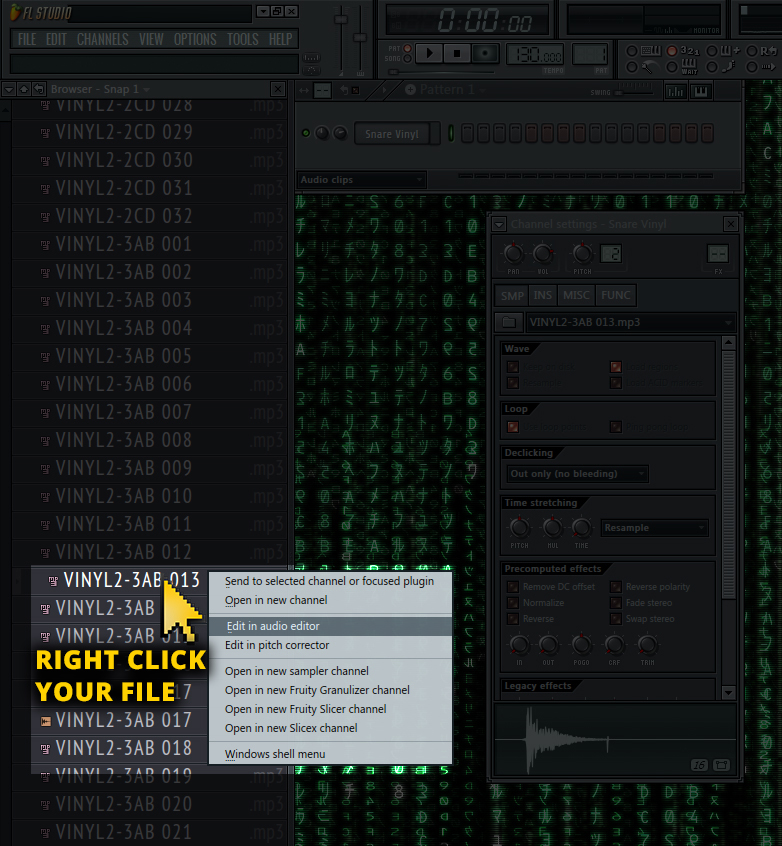
Right click your audio file and open it in the audio editor.
Step one
Find your sample that needs to be edited. You can see that I have a snare drum sample that has silence at the beginning (for natural swing or groove) and end, and I do not want that in my beat because it will throw the timing off on my snare hits and create an unnecessary silence at the end of my snare drum.
Find your sample in your file browser and open it in the file editor by right clicking the file and then clicking “edit in audio editor.”
Step two
With the file now open in the audio editor, you can see that I have unwanted silence at the beginning and end of my snare drum sample, which will ruin the timing of my beat unless all of my samples have the same swing. In FL Studio, it’s easy to add your own swing to your projects, so this silence on my snare drum sample is highly unnecessary. If you look toward the decline of my snare drum waveform, you will see that I have a sharp vertical click, which is a result from the sample being taken from an actual vinyl record.
Simply click and hold your left mouse button and highlight the unwanted silence of the waveform. Once you have your region of silence selected it will be highlighted red. Now, you need to right click, go to Edit > Delete, or simply press the delete key on your keyboard for a quicker deletion process.
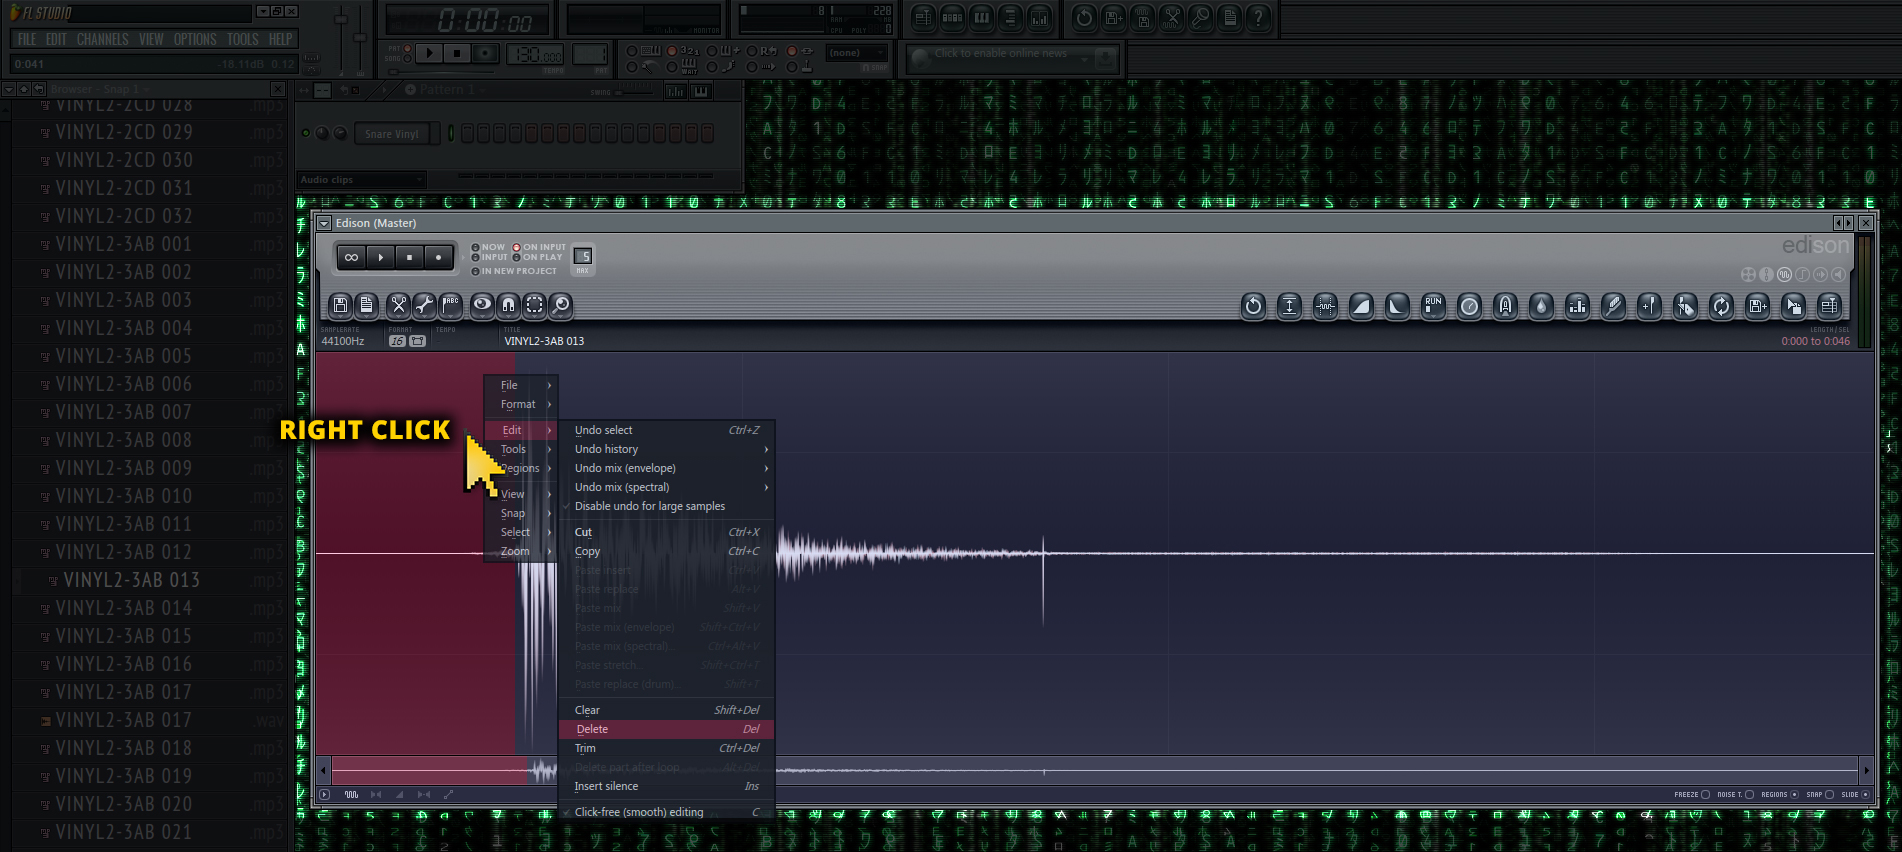
Delete the beginning silence from your sample (click to enlarge)
Step three
After removing the dead silence of my snare drum sample, I want to make sure there are no clicks or pops at the beginning of the sample. In order to eliminate clicks and pops at the beginning and end of samples, we need to "zero" them out. In other words, the sample needs to start at an even zero decibels of noise. I recommend zooming into the beginning of your sample for this task, and you can do so by selecting the far right edge of the long rectangular bar at the bottom of the Edison sound editor. The zoom bar also features a minimized waveform of your current working sample to make it easier for zooming.
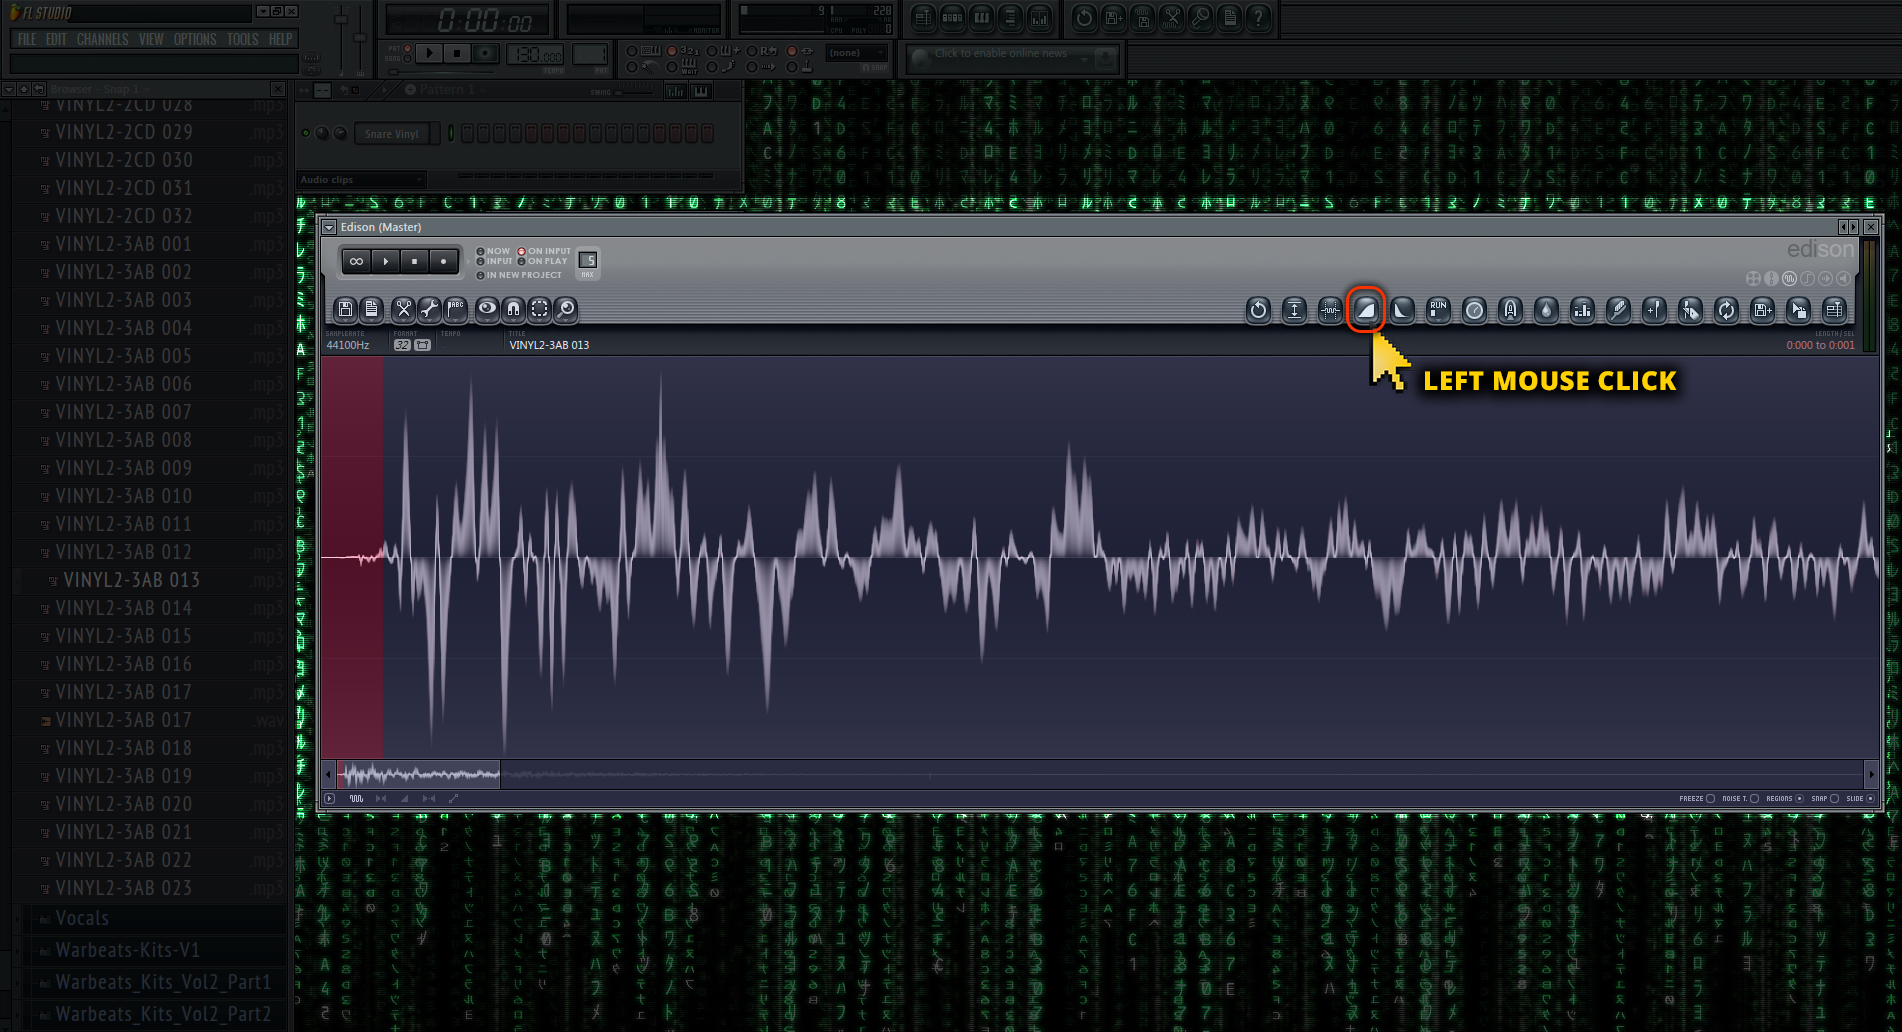
Fade in the sample to eliminate clicks and pops (click to enlarge).
Now that you are zoomed in to the beginning of your waveform, you need to select a very small region of the waveform before the harsh impact of the snare drum sounds off. Try not to eliminate the actual sound itself by selecting too far into the sample. With your selection made, you need to left click the "fade in / declick in" function in the toolbar of the Edison audio editor. It looks like an inclined hill icon. You can click this icon and it will increasingly fade in the sample more and more each time you click. I clicked the fade in button a couple of times for this snare drum sample.
Step four
You can’t do the beginning without doing the end. Our major task at hand on the end of this snare drum sample is to eliminate that nasty vertical click in the decline of the waveform. No worries, simply make a comfortable selection and then left mouse click on the "fade out / declick out" icon in the toolbar of the Edison audio editor. Keep clicking until the end of your sound fades out to zero decibels, or a flat line with no waveform at all. After fading out the sample, simply select the region of dead silence and press delete on your keyboard like we did in one of the previous steps. Your sample should be looking pretty clean now.
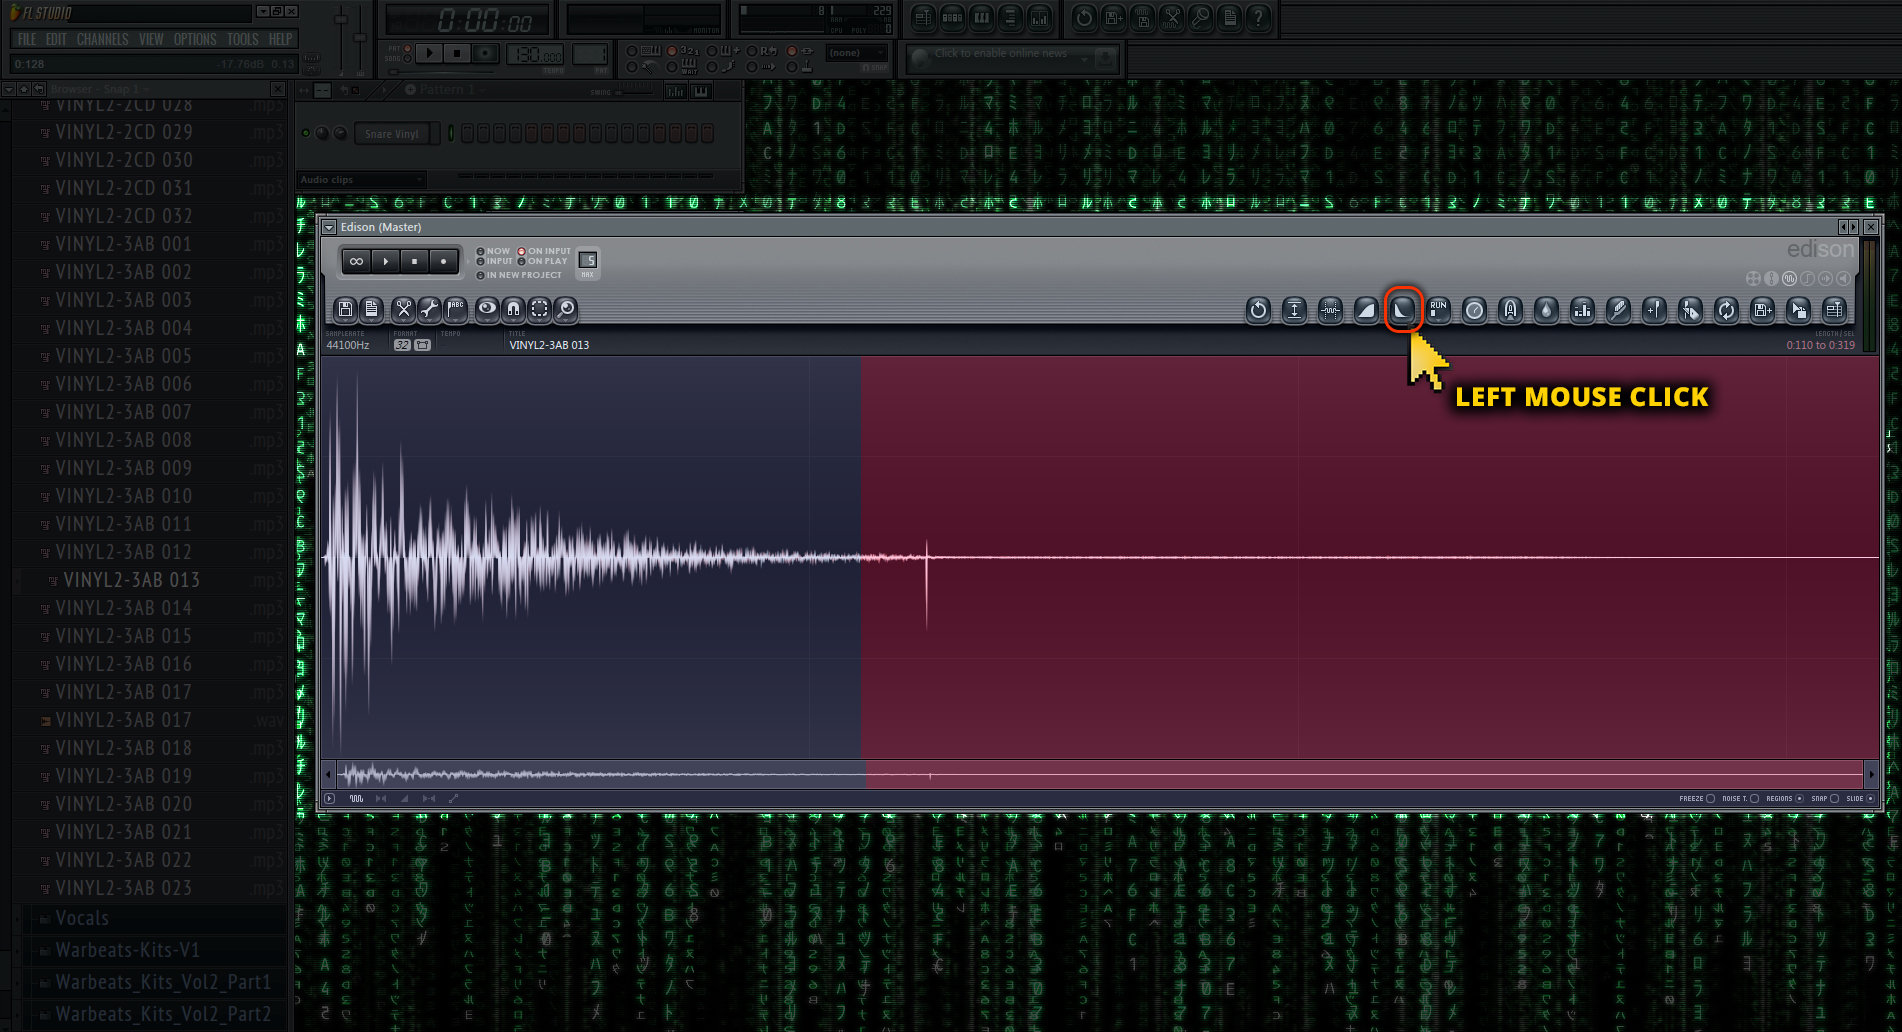
Eliminate the tail of the sample (click to enlarge)
Step five
It’s time to save our sample. You can easily save your sample right from the Edison audio editor by left clicking the floppy disk icon in the toolbar. I usually like to overwrite my cleaned samples and manually add swing or groove to them on a project basis instead of the individual sample. This gives me more control and less hassle in the long run. You may choose to save your sample as a backup and keep the original, but you should decide which process works best for you. Just make sure to know where you save your file, or else you won’t be able to reload it in your step sequencer. You’ll see why I like to overwrite my original sample in the next step.
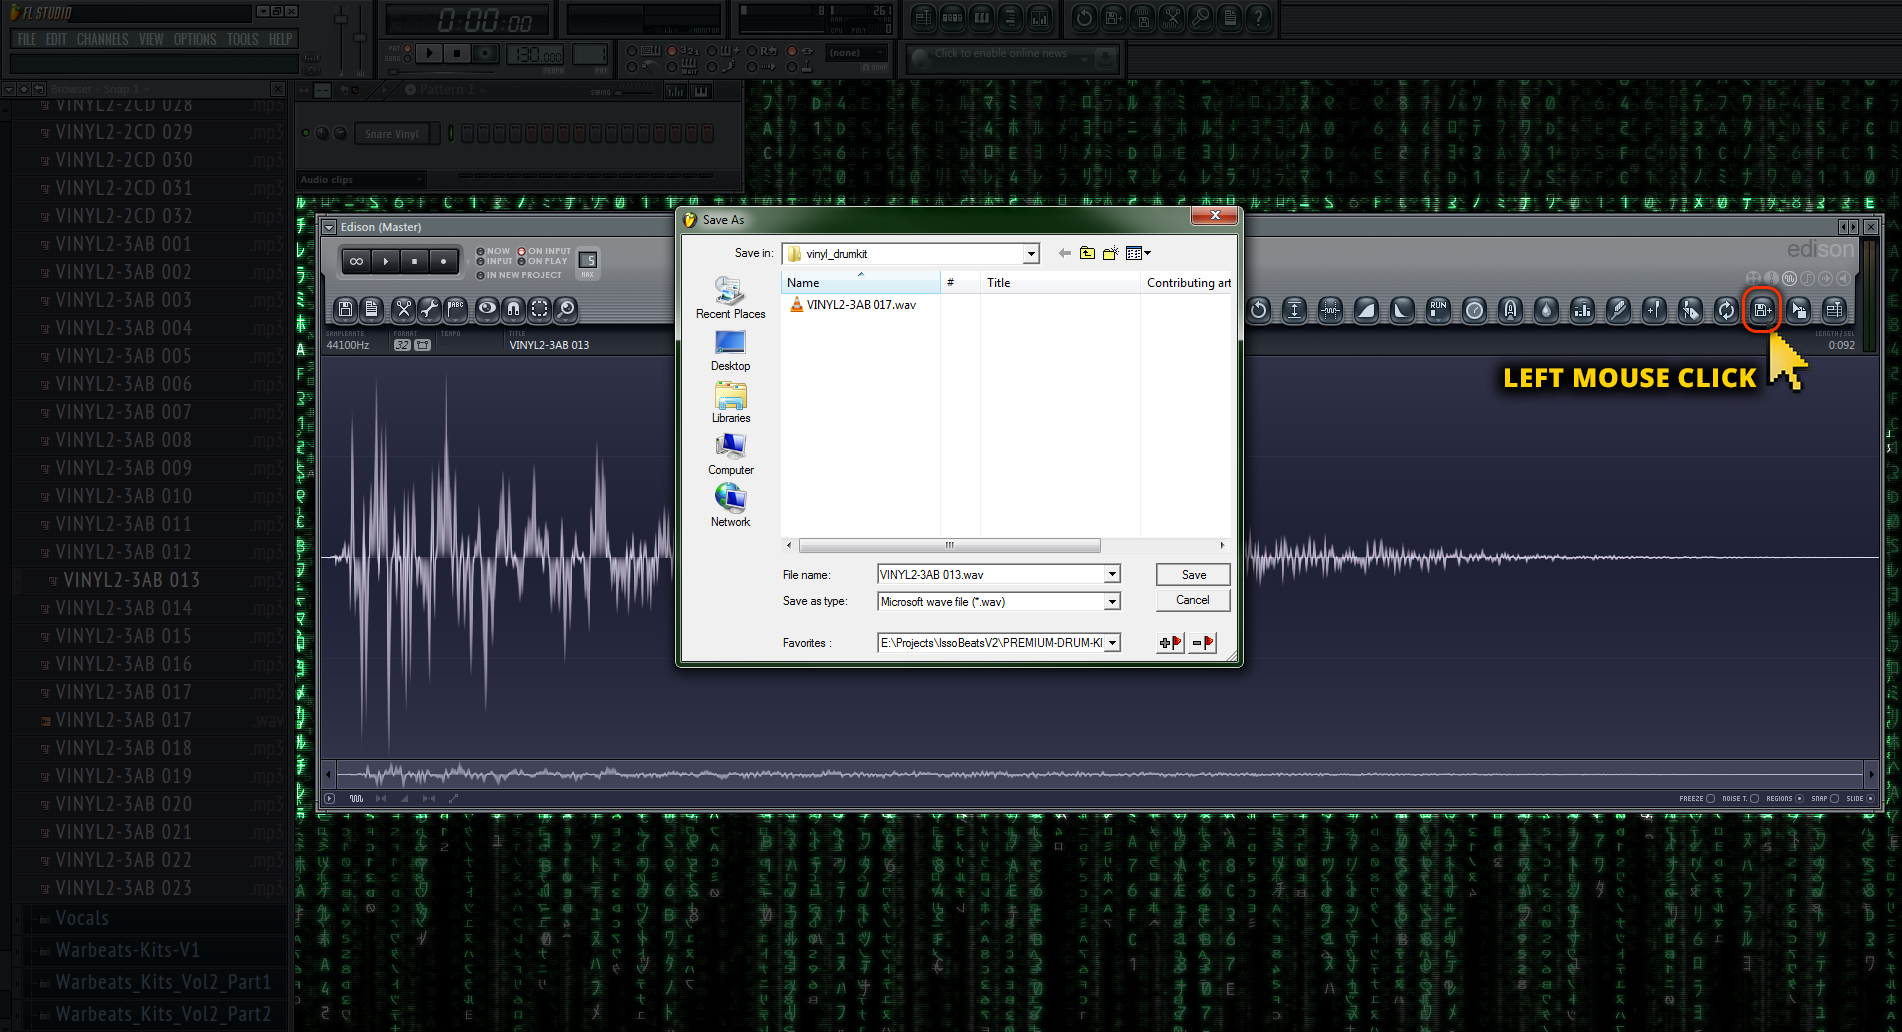
Save your newly edited sample (click to enlarge).
Step six
Lets open up our step sequencer. If yours isn’t already visible, you can press F6 on your keyboard to show it. I already had my snare drum sample loaded up into my step sequencer by dragging and dropping it there from my file browser on the left. You need to left click your sample so your channel settings menu pops up.
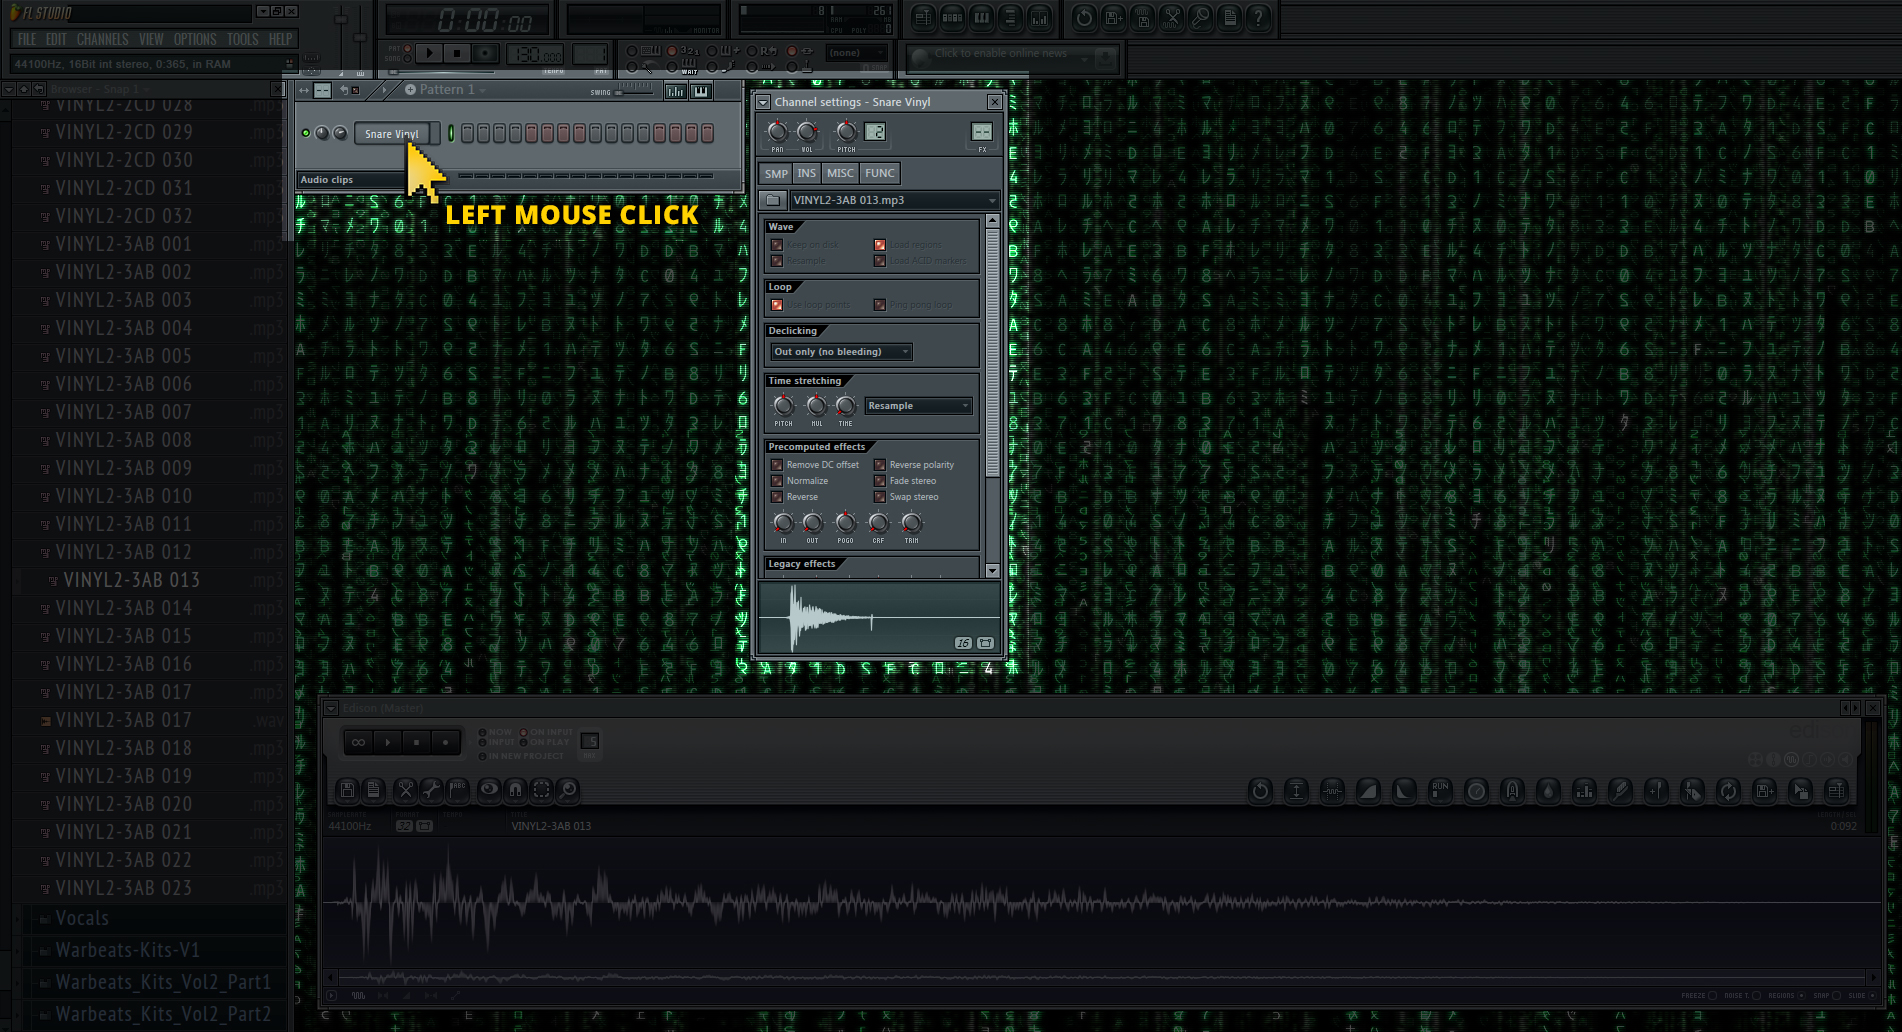
Open up your newly edited sample (click to enlarge).
In your channel settings menu, you should see your old waveform if you already had it opened before editing the sound in the Edison audio editor.
Step seven
Our waveform will display at the bottom of the channel settings menu. Since my old sample was already loaded, it’s showing the old unedited version of my snare drum. Right click the waveform display and then click on "Reload." Your newly edited sample should be loaded in the channel and take effect in the project. If you didn’t overwrite your original sample, simply drag and drop the audio file from your file browser into the step sequencer to begin production.
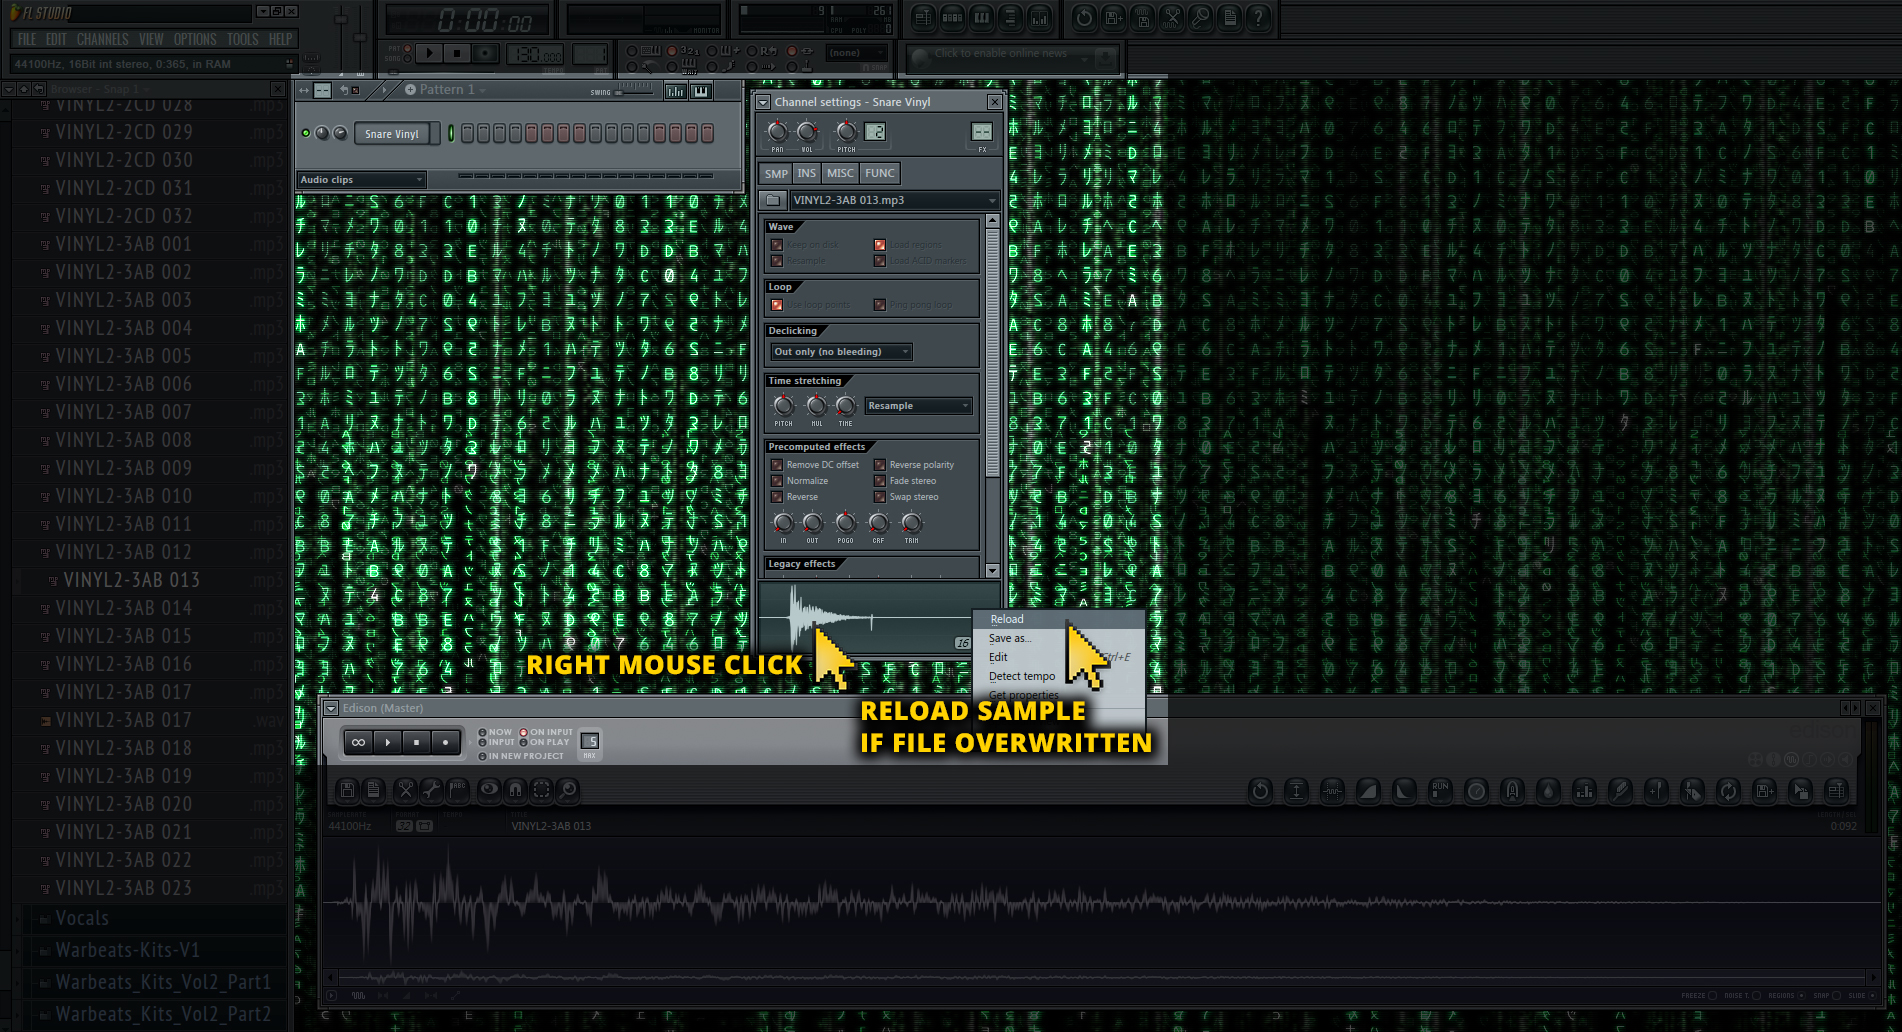
Finally, reload the sample into the channel settings menu (click to enlarge)