
Creating automation clips in FL Studio is super easy and only takes a few minutes of your time.
Continue reading below for a detailed writeup on how to create automation clips in FL Studio. I cover how to create basic pitch and volume automation clips in my video, but these same techniques can be applied to practically any type of automation clip!
Firstly, you need to create a project in FL Studio by simply opening the program. For the sake of this tutorial, I will assume you have a project created already.
Let’s say we want to create a volume fade out at the end of our song. It’s really easy, and this technique applies to other automation clips as well. Read or watch below for the easy steps on how to create a simple automation clip in FL Studio.
How to create a volume automation clip in FL Studio
To create an automation clip, right click practically anything with a knob, and then select “Create Automation Clip.”
- Right click the master volume fader on the top left of the FL Studio window
- Move your mouse down and left click on “Create Automation Clip” on the pop up window
- Navigate to your playlist window (F5 keyboard shortcut)
- You will see a new colored automation clip
- Scroll to the end of the automation clip inside of the playlist window
- Place automation points on the clip by right clicking inside the clip area and dragging your mouse to the desired location
- Hold shift while clicking to maintain a consistent, level volume percentage
- Experiment by right clicking on automation points and using different curve modes
- Flatten out or reset an automation curve by right clicking the center hollow point in between the 2 main automation points (see my video for extra details on this topic)
Animated GIF showing how to fade out the volume in FL Studio.
The same instructions above can be applied to the majority of knobs, buttons, and faders inside FL Studio. Automation clips are a fantastic feature and I highly recommend to just start right clicking everything to see if it allows you to create an automation clip. Using automation is something every musician must learn if they desire to create their own music. Experiment and have fun.
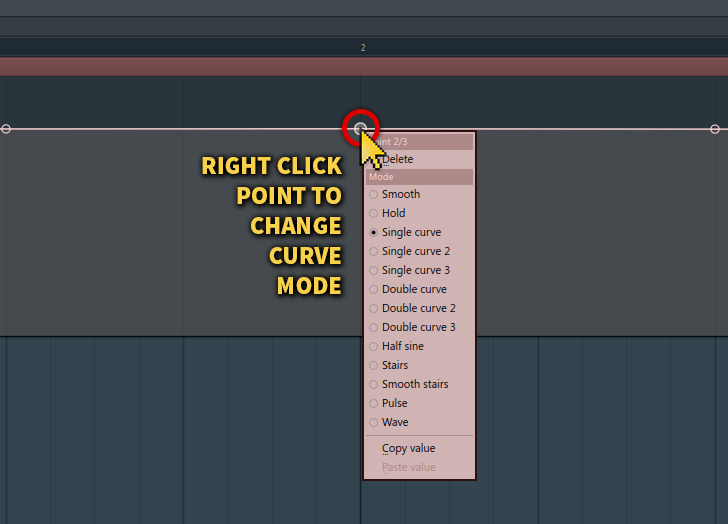
Right click on an automation point and try experimenting with different curve modes to get some really cool effects!
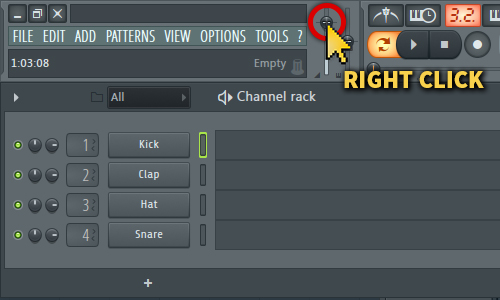
Remember, your new automation clips will be instantly stored inside of the “step sequencer” (F6 keyboard shortcut) after you create them. The term “step sequencer” is now deprecated and should be referred to as the “channel rack” which features all of the channels that you can individually route to the main mixer. The new automation clips you create will also be populated into the main playlist window by default into the next empty playlist track. I like to keep my automation clips on the top of my playlist and the individual loop patterns at the bottom for better organization purposes. It can get quite confusing having your automation clips and loops overlaying one another when you have 50+ tracks on a project, so be sure to label everything and keep it organized in a way which best suits your production style.
Deleting An Automation Clip In FL Studio
On another note, deleting an automation clip is also quite simple. Simply navigate to your channel rack (F6) and look for the clip you’d like to delete. Right click the channel button, and then click delete on the pop up menu. Done!
Zanderjaz’s Pro Tip: Creating Channel Groups In FL Studio To Stay Organized
If you’re like me and create a ton of automation clips and channels for complex songs, I highly recommend creating separate groups for your different automation clips, drums, FX, VSTs, and other channels. Easily create a channel rack group by selecting your desired channels with the right mouse button and then press “ALT + G” on your keyboard. Type a name for the new channel group and then hit enter on your keyboard. Be sure to give your group an obvious name so you can remember it in the future. Being lazy during the production process can only bring more nightmares and headaches in the future!